Automatic Watering System UK: A Beginner’s Path to 4-Zone RF
Start an automatic watering system from a UK outdoor tap — timer, filter, PRV, drip or soaker — then map four thirst zones (A–D) so pots, veg and borders get separate programmes.
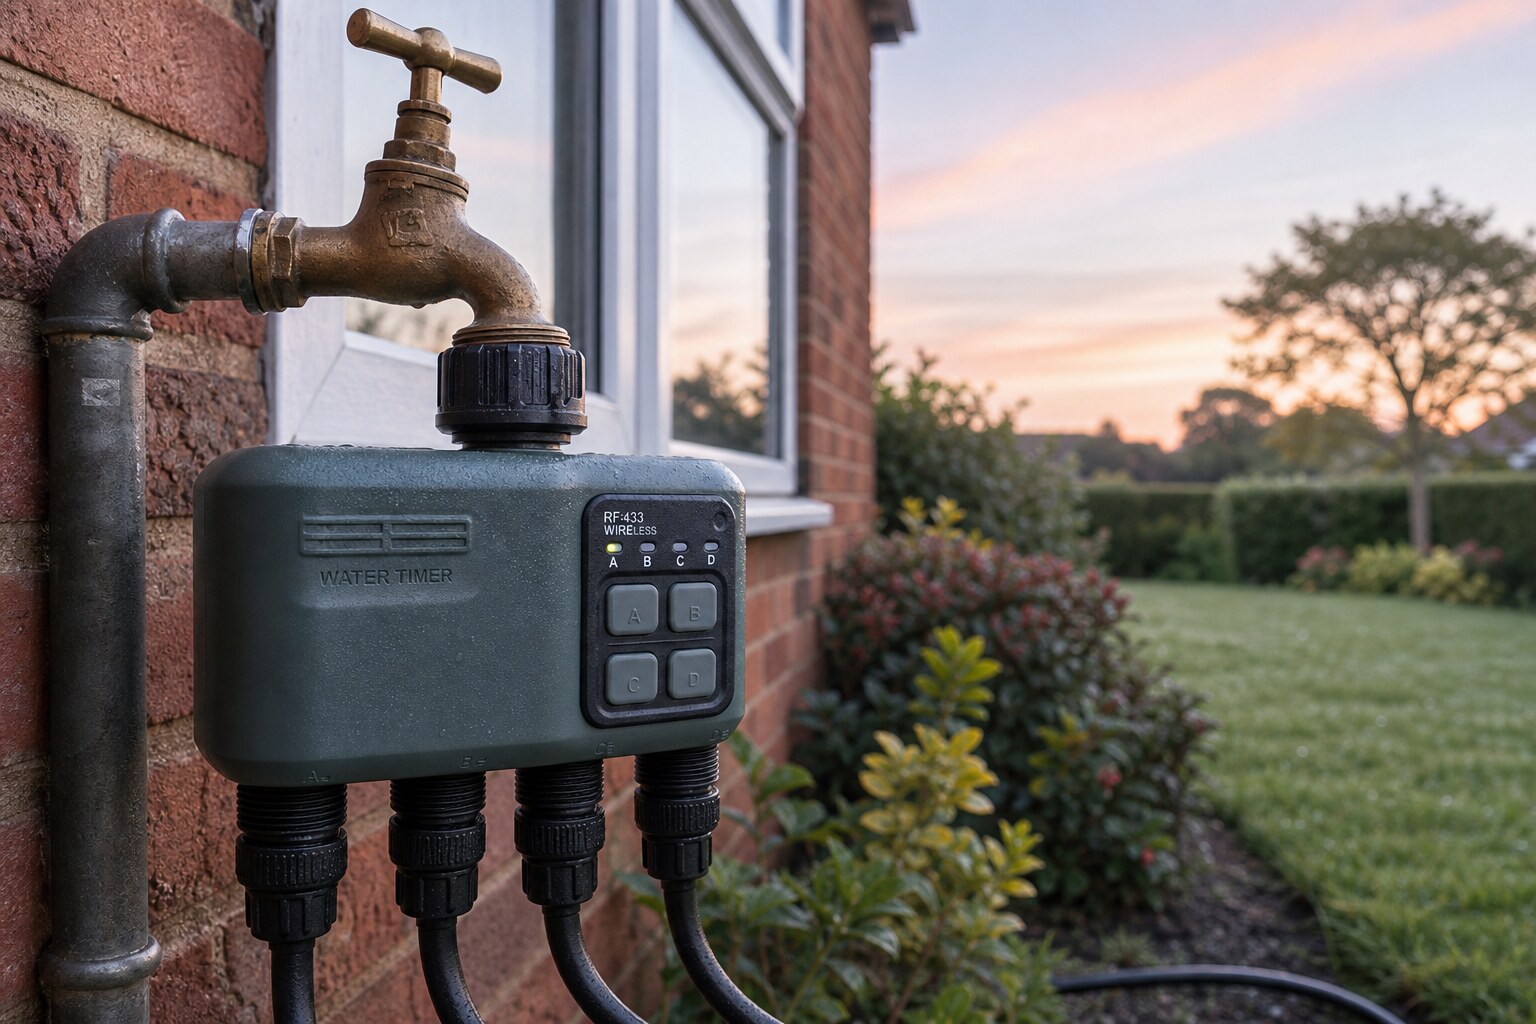
An automatic watering system is an outdoor tap (or pumped water butt) feeding a timer plus drip or soaker laterals so plants get scheduled root-zone water without standing at the hosepipe. For UK beginners, lock the stack — tap → timer → filter → pressure reducer → 13 mm supply → emitters — then plan four thirst classes early: pots, veg, borders and a spare patch rarely share one programme without waste. This guide is the pillar for an automatic watering system: the beginner on-ramp to four sequential RF zones (A–D) on one outdoor tap. For the plain “how does it work” explainer and the easiest starter kit, see how an automatic watering system works.
Decision ladder on this page: define what “automatic” means outdoors → lock the hardware order → see why one programme fails → map sample zones A–D → note light WRAS / Temporary Use Ban checks → graduate to a four-outlet RF timer when thirst diverges.
What an automatic watering system is
In British gardens, an automatic watering system means scheduled delivery from an outside tap through a watering system timer into a network of supply pipe and emitters. The timer decides when; drip stakes, dripline or soaker (porous / leaky) hose decide how water reaches compost and soil. It is not a black box you fit once and ignore — weather, growth and aspect all change how long each cycle should run.
Timer plus delivery — not set and forget
Think of two halves: control (battery or RF tap timer) and delivery (micro-drip, dripline or soaker). Brand ABCD guides (tap connection → pipeline → drippers → sprinklers) describe the same idea in kit language. You can start with one ready kit and one programme; you graduate when different patches need different durations and frequencies. Automation removes the daily hosepipe chore; it does not retire the finger test.
Outdoor-tap framing vs indoor waterers
Search results for automatic plant watering system often pull AutoPot gravity kits and indoor gadgets. This page stays on outdoor-tap automatic garden watering — a mains (or pumped) feed, BSP threads, filter and pressure reducer, then laterals in the garden. An automatic irrigation system is the same outdoor idea under a more formal label; the job for beginners is still the same: timer + delivery, then honest zoning. If you came here chasing indoor reservoirs or gravity trays, those are a different product class — park them and keep the outdoor-tap path below.
The beginner stack: tap → timer → filter → PRV → laterals
Lock this order on a mains outdoor tap before you invent schedules. Wrong order is the most common first-week failure: grit into emitters, or full mains pressure into micro fittings.
Outdoor tap (¾″ BSP)
  → battery / RF timer
    → filter
    → pressure reducer (PRV)
    → 13 mm supply
    → 4 mm micro / dripline / soaker laterals
Locked order on the mains
Screw the timer onto the tap first (hand-tighten; PTFE on sticky threads if needed). Leave the tap open once the timer is fitted — the timer, not the tap handle, becomes the on/off control. Fit the filter next so grit does not clog the reducer or emitters, then the pressure reducer (PRV) so micro fittings see a calmer pressure (kit PRVs commonly target around 1.5 bar). Trade timer guides stress the same sequence: timer before the PRV, filter before the reducer.
Do not put the filter or PRV between the tap and the timer on a constantly open outdoor tap: the timer should see tap pressure at its inlet and control the open/close; the filter and reducer protect everything downstream of the valve. Do not reverse that chain.
Pipe norms beginners actually use
UK micro kits usually run 13 mm as the primary carrier and 4 mm micro tube to pots and individual plants. Common stake drippers are about 4 LPH; pressure-compensating dripline is often around 2 L/h every ~30 cm. Brand kit notes typically keep a supply run around ≤25 m (or roughly double if ringed) and micro lengths around ≤15 m per run — treat those as planning cues, then check every emitter flows. If the far pot stays dry while the near pot puddles, shorten the run or split the circuit — do not “fix” it by opening the tap harder.
Kit start is fine — graduate when thirst diverges
A Hozelock-, Claber-, Gardena- or HydroSure-style pot kit is a sensible first automatic watering system uk purchase. Which? and retailer pages will sell you “best kit” scores; skip the listicle chase. Use one kit to learn the stack, flush the lines, and prove every emitter runs. You graduate when patio pots, veg and borders stop agreeing on minutes and starts — that is the signal for zones, not for a second identical single-outlet timer fighting the same mismatch.
Why one programme fails
One outlet and one start pattern force every patch to share the same frequency and duration. That is the structural problem — not “you chose the wrong brand of dripper.”
Containers daily, borders weekly
Editorial how-tos (Gardeners’ World install cues and trade FAQs) keep returning to the same mismatch: containers and hanging baskets often want something like a ~30-minute daily habit in warm weather, while established borders may want a similar soak about once a week. Put both on one outlet and one start pattern and you either drown the border or bake the pots. That is why the zone map comes before you chase perfect minutes.
Starter minutes — then finger-test
Trade starters look contradictory until you separate thirsty drip patches from established borders:
| Cue source | Applies to | Soft starter | Not for |
|---|---|---|---|
| Easy Garden Irrigation FAQ | General drip / micro circuits | 2 × 20 minutes a day (morning + before sunset); shorter for micro-jets | Weekly border soaks |
| HomeGrower-style ranges | Pots and raised beds by size | Small pots 10–15 min; large pots 15–25; raised beds 15–30; warm greenhouse a little longer | Copying one number to every zone |
| Gardeners’ World-style contrast | Containers vs borders | Containers often daily; borders often weekly soak | Forcing both onto one programme |
Use those as soft openers, then dig a finger a few centimetres down and tune. Early morning (often cited around 5–9 am) cuts evaporation and overnight wet-foliage risk; evening drip-to-soil is acceptable, spray/mist less so. Never first-run a new system the day before you travel. Test several days while you are home so you can catch dry ends, leaks and over-watered corners.
Map four zones early
Plan thirst classes before the patio fills with mismatched pots. On one outdoor tap, four sequential zones keep each lateral at full pressure — that is the logic, not “four zones because the box says four.”
| Zone | Thirst class | Typical patch | Schedule lean (starter — tune on-site) |
|---|---|---|---|
| A | High / frequent | Patio pots, hanging baskets, grow bags | Short cycles, 1–2× daily in heat |
| B | Daily veg / fruiting | Tomato/courgette drip, greenhouse staging | Medium duration, near-daily in summer |
| C | Borders / established beds | Herbaceous border, shrub strip (drip or soaker) | Longer soak, fewer starts/week |
| D | Spare / different aspect | Hedge strip, second bed, or lawn only if using a permitted method | Match method; often longest/rarest |
Zone A — high thirst
Short, frequent cycles. Baskets and small pots dry fast in wind; they should not share a weekly border soak. If Zone A needs two starts and Zone C needs one soak a week, that is proof the map is working — not a reason to average them into one weak compromise.
Zone B — daily veg
Near-daily summer drip for fruiting crops. Medium minutes; watch fruit swell and leaf wilt, not only the surface crust. Veg that fruit hard in July often outgrow a spring “pot kit” programme — keep them off Zone C’s weekly rhythm.
Zone C — borders
Longer, rarer soaks via drip or soaker. Fewer starts per week once roots are established. Do not borrow Zone A’s daily minutes “just to be safe” — that is how borders get soggy while pots still look fine at the surface.
Zone D — spare / aspect
Use the fourth outlet for a different aspect, a hedge strip, or a second bed — not as an excuse to open every outlet at once. Lawn only belongs here if your chosen method and water-company rules allow it; sprinklers and mist are a different compliance story from fixed drip.
Run A → B → C → D in sequence. One tap cannot honestly feed four laterals at once without starving pressure; sequential runs keep each zone’s emitters behaving like the kit datasheet promised.
Light UK checks: WRAS and Temporary Use Bans
These are short compliance cues so you do not skip legality while chasing schedules. They are not a Category 5 / RPZ thesis for buried specialist irrigation.
Outdoor tap and double-check valve
Under the Water Supply (Water Fittings) Regulations 1999, an outside hose-union tap is a backflow risk. Domestic baseline protection is a WRAS-approved double-check valve (DCV) on the supply (Category 3). Many modern outdoor taps include integrated check protection — verify yours; older properties often lack it. If you are unsure, ask a WaterSafe plumber before you hang a multi-zone timer and a long drip network off an unprotected outlet.
Temporary Use Ban (hosepipe ban)
During a Temporary Use Ban, several companies (including South East Water’s published Kent FAQs and similar Anglian-style wording) commonly allow fixed drip or trickle systems that are not handheld, fitted with a pressure-reducing valve and a timer, placing water drip-by-drip on or into the soil without jet, mist or runoff. Sprinklers and misters are usually restricted. Rules vary by company and drought stage — check yours before you rely on automation in a ban. No brand, including Johgee, grants legality. See our notes on Temporary Use Ban and drip systems.
Graduate to a 4-zone RF tap timer
When pots, veg, borders and a spare patch need different programmes, a single mechanical outlet becomes the bottleneck. The stack and the A–D map are already the hard thinking; the four-outlet timer is the control layer that makes that map real.
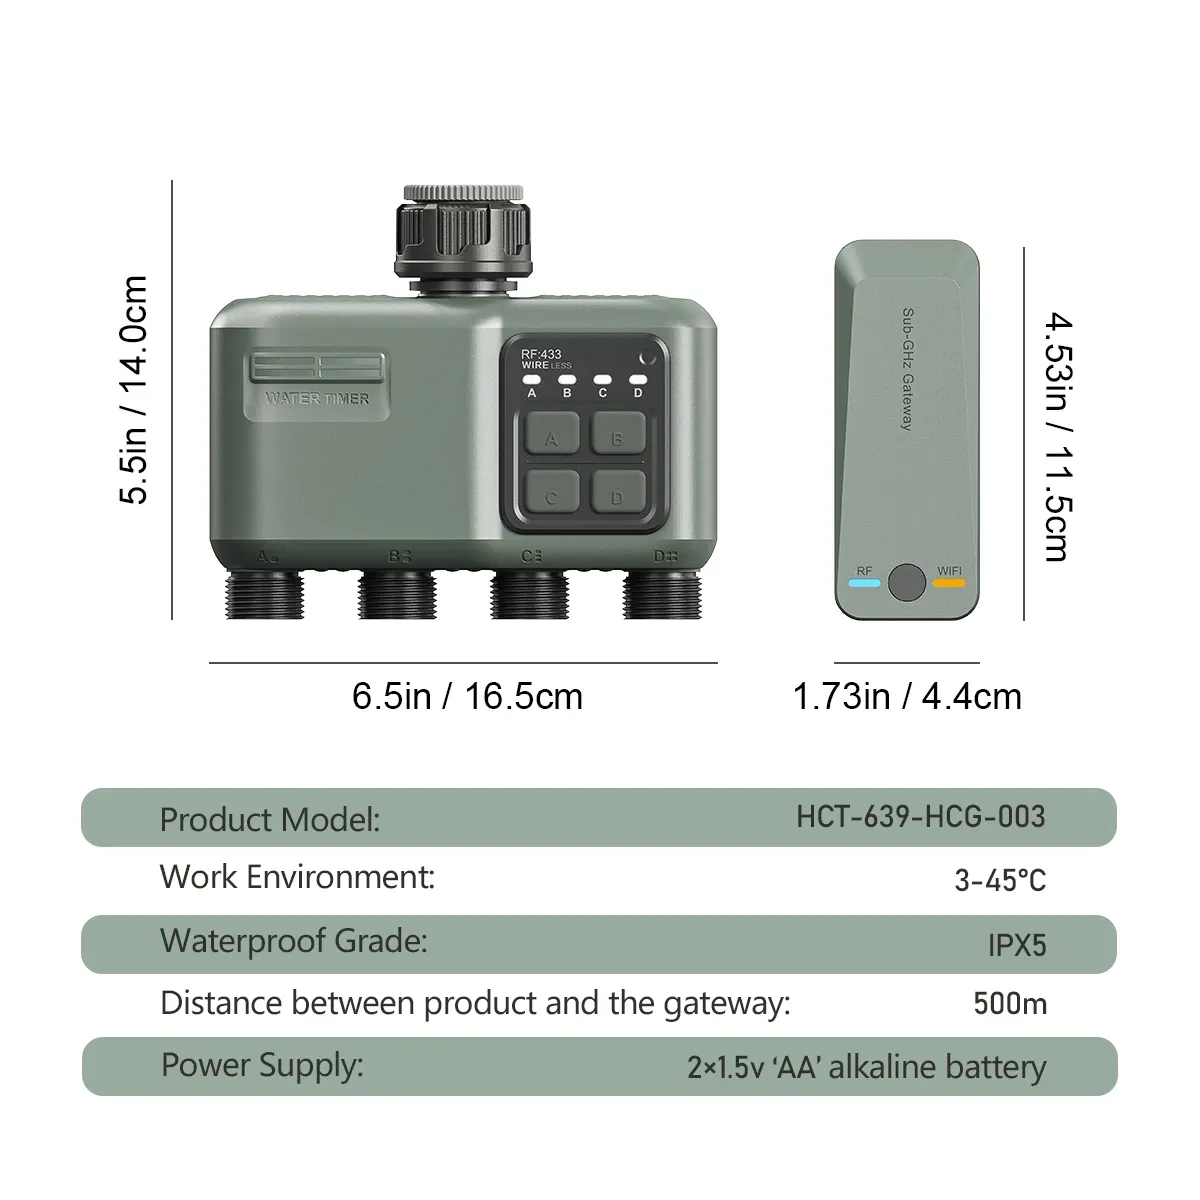
A four-outlet / four-zone timer runs zones one after another so each lateral keeps honest tap pressure — do not open all outlets together. Soft path for that controller job: the Johgee 4-Zone RF Smart Water Timer (olive RF-433 family, zones A/B/C/D) with an indoor WiFi gateway for brick and long-garden layouts where the outdoor tap sits far from the router. Use it as the zone controller after you have locked the beginner stack and drawn the A–D map — then check the Johgee 4-Zone RF specifications for valve, battery and gateway detail before you buy.
No fake reviews or ratings here. For timer types in general, see outside tap timer guide. For method deep-dives (soaker vs drip, leaky layouts, double-tap zoning, butt-pump feeds, hanging baskets), use those sibling guides when you need install detail — this page owns the beginner → multi-zone decision, not those how-tos.
CTA sequence (do this in order): sketch A–D on paper → prove tap → timer → filter → PRV → laterals on one kit circuit → only then move the same map onto a four-zone RF controller and open the specs link above. Skipping the sketch usually means buying outlets you then wire into the same bad single programme.
Quick answers
What is an automatic watering system?
An outdoor tap (or pumped butt) feeding a timer plus drip or soaker laterals so plants get scheduled root-zone water without standing at the hosepipe.
How do I set up an automatic watering system from an outdoor tap?
Screw a timer onto the tap, then filter → PRV → 13 mm supply → emitters. Leave the tap open so the timer controls flow. Start with a kit if you like, flush and leak-test, then tune run times by soil check over several days.
What order do timer, filter and pressure regulator go in?
Outdoor tap → timer → filter → pressure reducer (PRV) → supply pipe → drippers or soaker. Do not put the PRV or filter upstream of the timer on a constantly open tap — the timer should be the first device after the tap.
Can one timer water pots and borders the same way?
Rarely well. Pots often need short daily cycles; borders want longer, rarer soaks. One shared programme usually overwaters one patch and underwateres the other — that mismatch is why you map zones A–D instead of averaging minutes.
Why do I need more than one watering zone?
Different thirst classes need different durations and frequencies. Multi-zone timers run each lateral in turn so pressure and schedules stay honest on one outdoor tap.
How do I assign four zones (A–D) on one outdoor tap?
Map A = high-thirst pots/baskets, B = daily veg, C = borders, D = spare/aspect; run A→B→C→D sequentially. Do not open all four laterals together.
Will drip/trickle work during a Temporary Use Ban?
Many companies allow fixed drip/trickle with timer + PRV when water goes drip-by-drip into soil without jet or mist — rules vary; check yours. Johgee does not grant legality.
Next step
Sketch pots, veg, borders and a spare patch onto A–D, lock tap → timer → filter → PRV → laterals, then open the Johgee 4-Zone RF specifications when you are ready for sequential programmes on one tap. For the plain “how it works” explainer see how an automatic watering system works; for choosing a timer see the outside tap timer buying guide or the /faq/.
Ready to try Johgee Irrigation?
Shop Now â £84.99